
Confused, mind bruised, it seeps out
About the Build:
Earlier in the year I came into possession of a MG Z’Gok. Without a plan of attack the kit was put in to storage awaiting the day it would triumphantly return and lay waste to gaggles of unsuspecting GMs. Later, getting my hair cut back in October, I noticed that the place was selling something called Black Shatter nail polish by OPI. The premise seemed simple, apply a base coat using a colour of your choice, let it dry, then cover it with a coat of their shatter nail polish. This crackle polish is designed in such a way that the paint shrinks as it dries, allowing it to split, exposing the underlying surface. At the time, with Halloween less than a month away, the key combination on display was a glow in the dark base coat with black shatter on top. I thought to my self, "Well, that’s a pretty interesting idea. I wonder if that could work on a model," and filed the thought away for later reference.
Skip forward a month to November and Gundam Guy’s announcement of G-Shot 2011. After last year’s issues I wanted to come out swinging, but what to do? Then it hit me, combine that bloody Z’Gok with the glow in the dark and cracked paint scheme! Research time: What can be done to replicate that cracked effect? Options for glow in the dark? What theme would suit such a stylized Z’Gok?
After asking around and trying various products it seemed the best option for getting the glow came in a spray by Krylon, called Glowz. The other paints I found didn’t have the same glow strength and I wasn’t about to try some questionable chemistry from China. When I asked about glow in the dark paint at one of my local hobby shops they mentioned that it’s somewhat hard to come by these days, on account of the good ol’ stuff may have been potentially hazardous. I did notice that the Krylon paint did not provide the same late night glow I remember as a kid. (The question remains, do they just not make ’em like they used to, or is my remembrance of glow in the dark objects enhanced by nostalgia?)
They key to getting the best glow is to start with a nice white base so I primed then followed up with several thick coats of the Krylon glow in the dark paint. Krylon says that the thickness of the coats does not necessarily provide for a better glow but I did so anyway on account of the some spray inconsistencies. Luckily the glow in the dark paint dried evenly despite outrageous amounts I may have accidentally applied here and there. It did soften the base coat though and any sort of contact while the paint had yet to cure was likely to mess with the base as well. I went through quite a few 6oz cans… by the time I was done I had actually cleared out the three local Michaels craft stores.
To help enhance the glow I picked up a cheap black light off of Amazon. Turning that on for the first time and getting a look at the paint samples really kicked the project into high gear.
When it came to the cracked element I couldn’t find anything that worked like the nail polish. Thus, the only option it would seem, was to use the nail polish. Using nail polish to paint was a somewhat difficult task. Like painting with any other thick paint it’s easy to produce visitable brush strokes. The key is getting a coat on the first brush stroke, not too thick, not too thin, and following up with another next to it. That wasn’t so easy, as you can probably tell from the photos. In the end I had a kit with some very inconsistent cracking. I think it worked out well though, the difference in cracking pattern and density helped differentiate various parts of the kit.
One thing I did differently, in contrast to OPI’s recommendations, was apply the polish over a matte finish. In my testing I found that a matte finish caused the paint to split in more uneven, jagged lines. Using a gloss coat base provided a more geometric crack pattern which I thought would be too much over the whole kit. Below is an one of my paint tests…
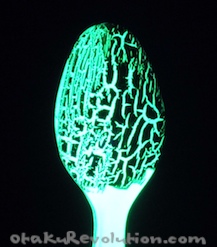
Left is the crackle nail polish over a glossy base, while the right over the matte finish provided by the Krylon spray.
For the most part the nail polish is pretty durable. It will, however, break from pressure provided laterally or from underneath. As you may have experienced by now gunpla part clearances are pretty tight. As expected the nail polish + several coats of glow in the dark paint + white primer created some clearance issues here and there. To put it simply… some parts had to be hammered into place. I also ran into issues with both the feet ball joints. Somehow, event though they received very little glow in the dark/white primer over spray they thickened up just enough to become really tight in the polycap joint. So tight that both actually broke off from the lower leg assembly. It was easy enough to glue back into place, but now the feet are locked into position with the lower leg.
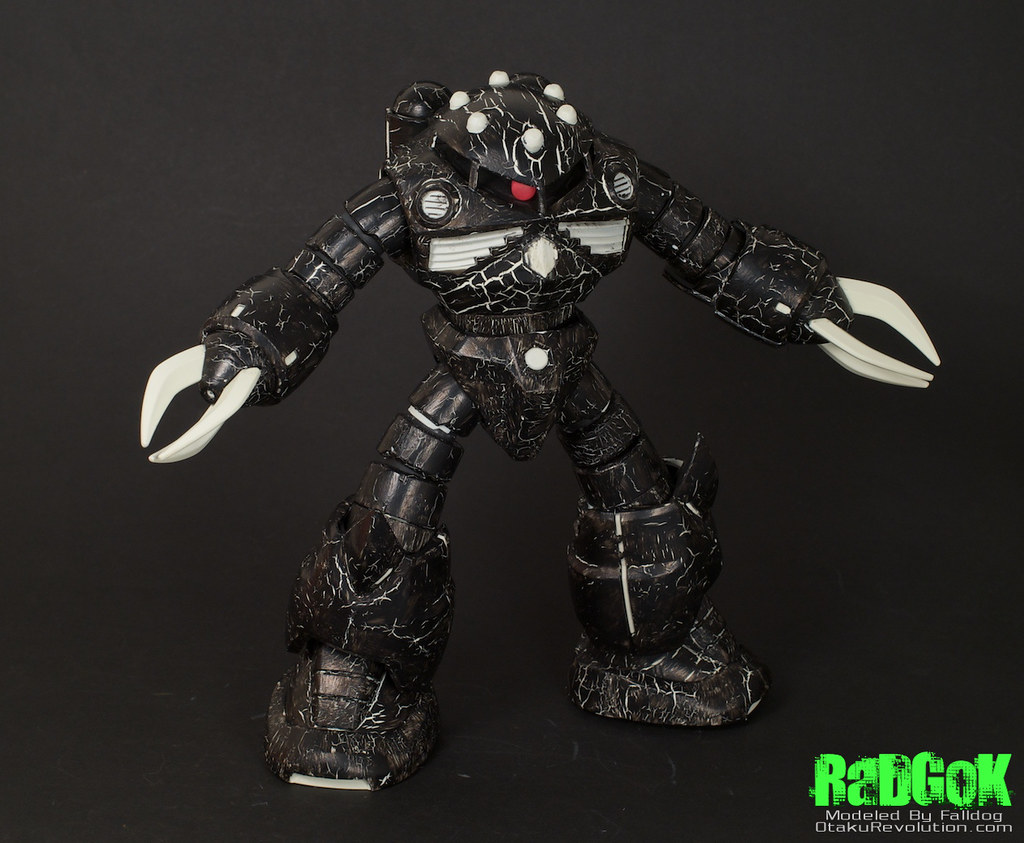
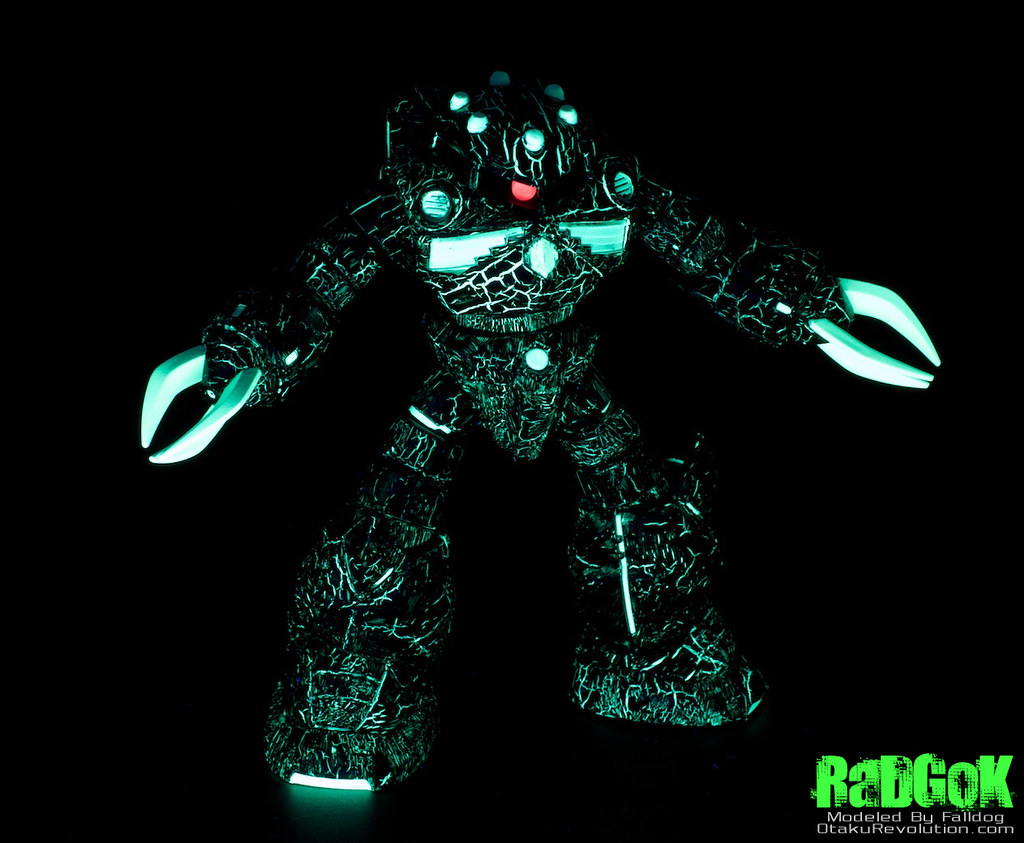
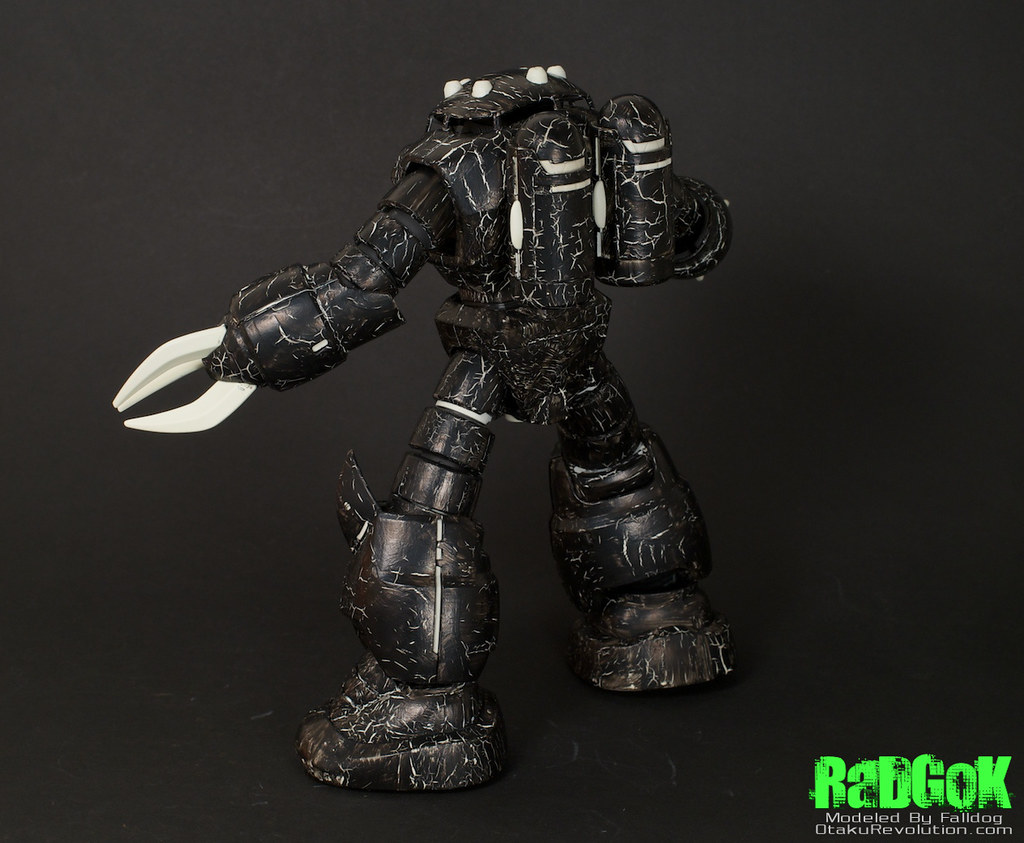
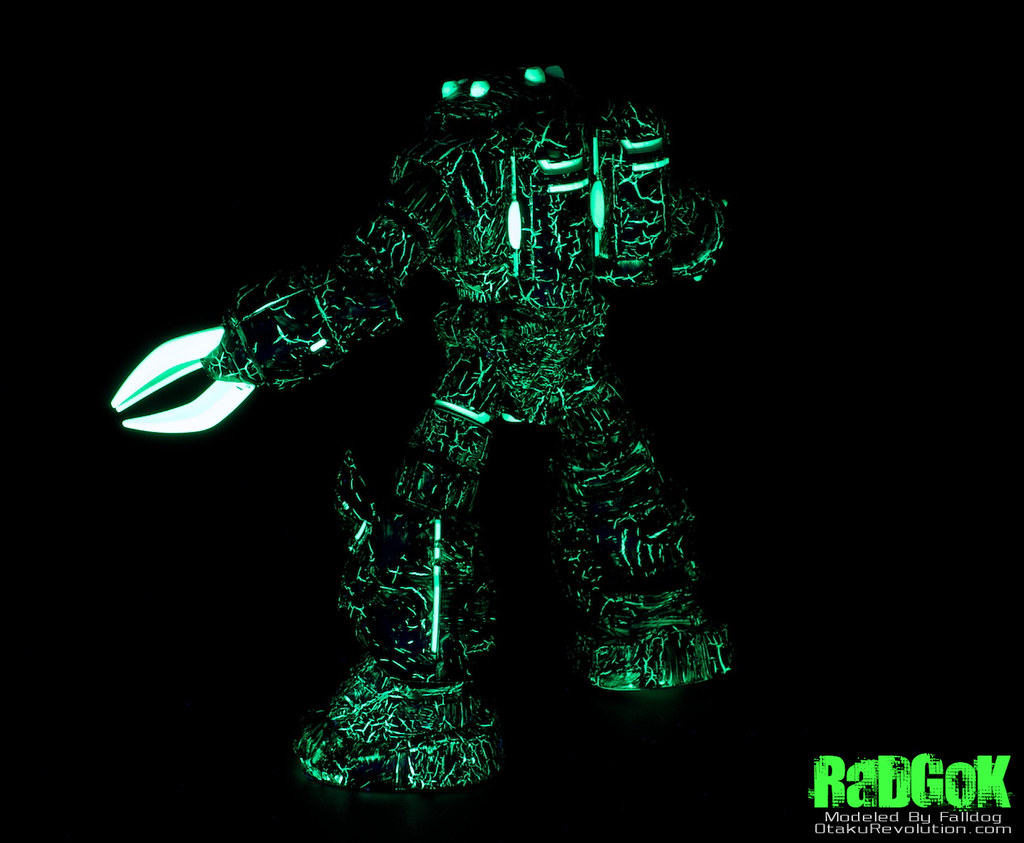
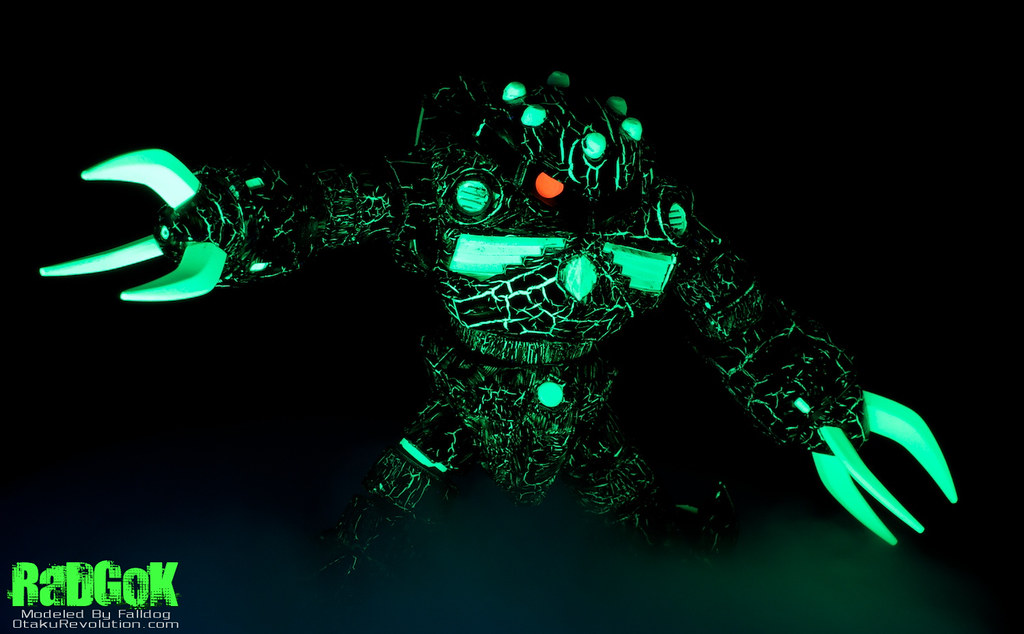
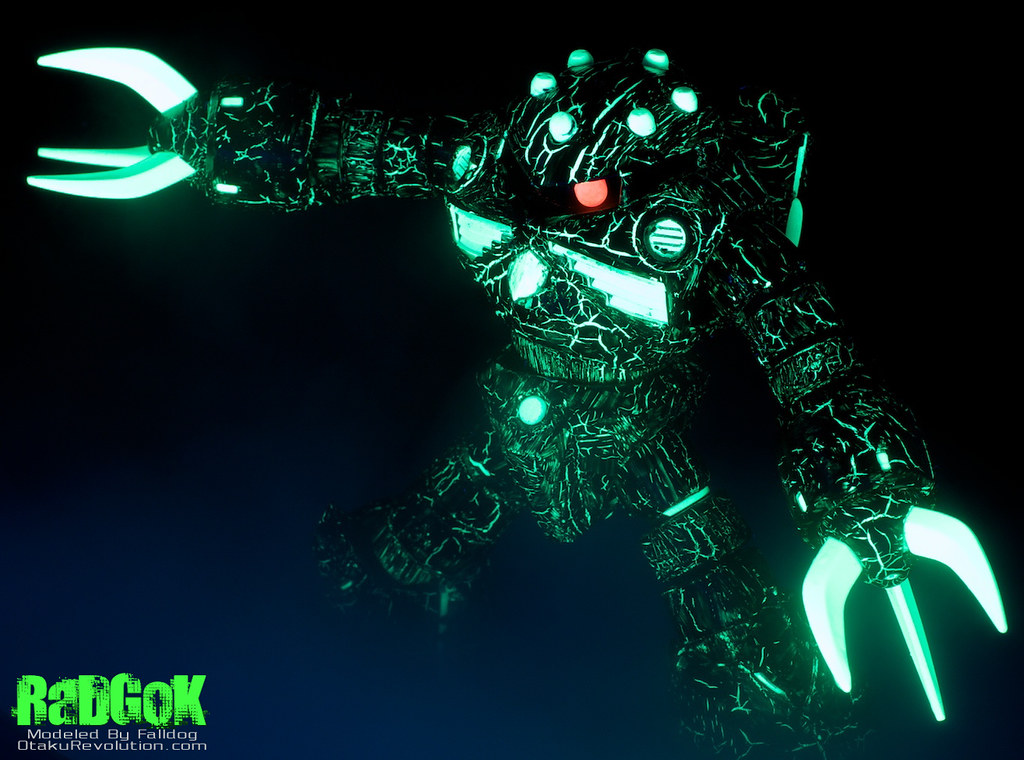
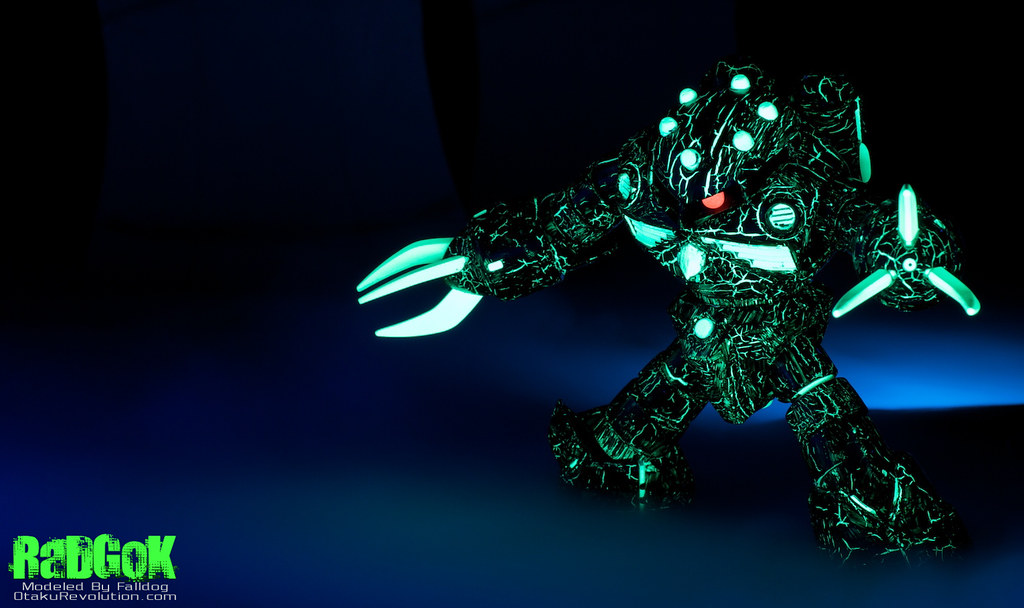
In the end things turned out quite well. The kit may not look that spectacular in normal lighting but with some isolated UV rays the kit really comes to life. The pictures below show the kit in normal lighting on the left, and with just the black light on the right.

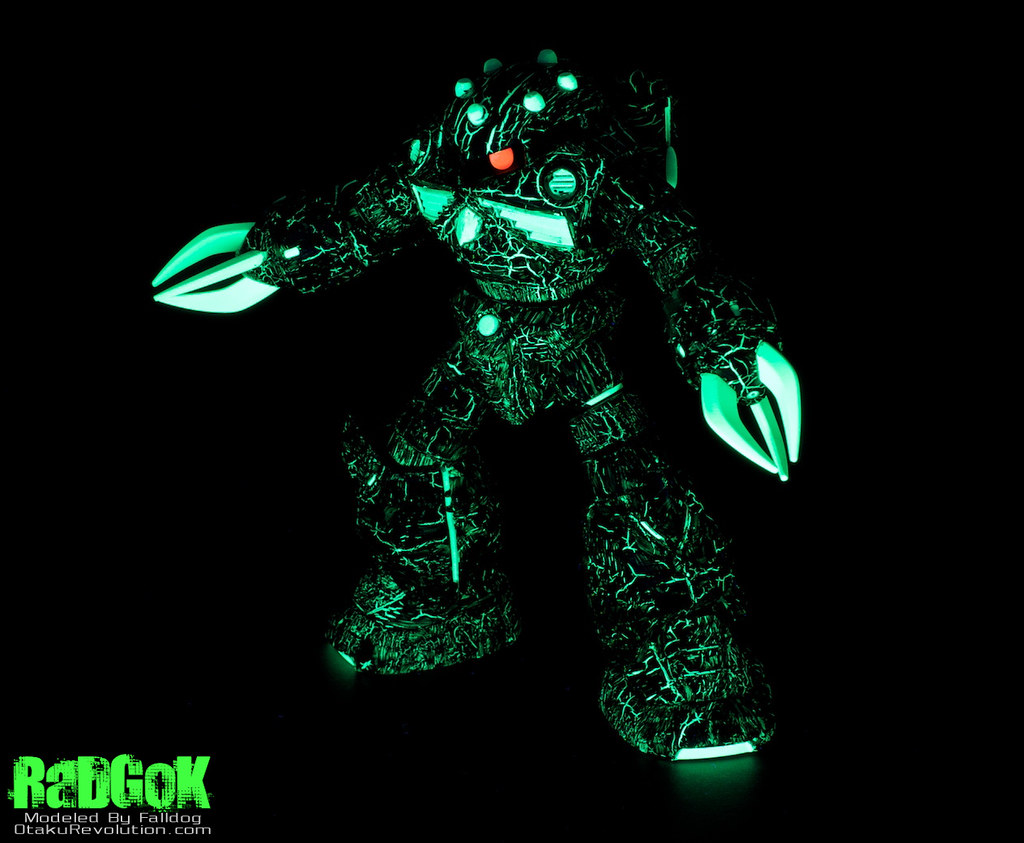


I love when a trip into uncharted territory works out.
I also want to note that the crackle looks pretty good with a nice gloss coat on top (dull not tested). I opted not to, for the sake of the planned photo shoot. The last thing I needed was having to deal with any sort of glare off the kit. Which is why, you may have noticed, the clear plastic visor has been left off.
About the Photos:
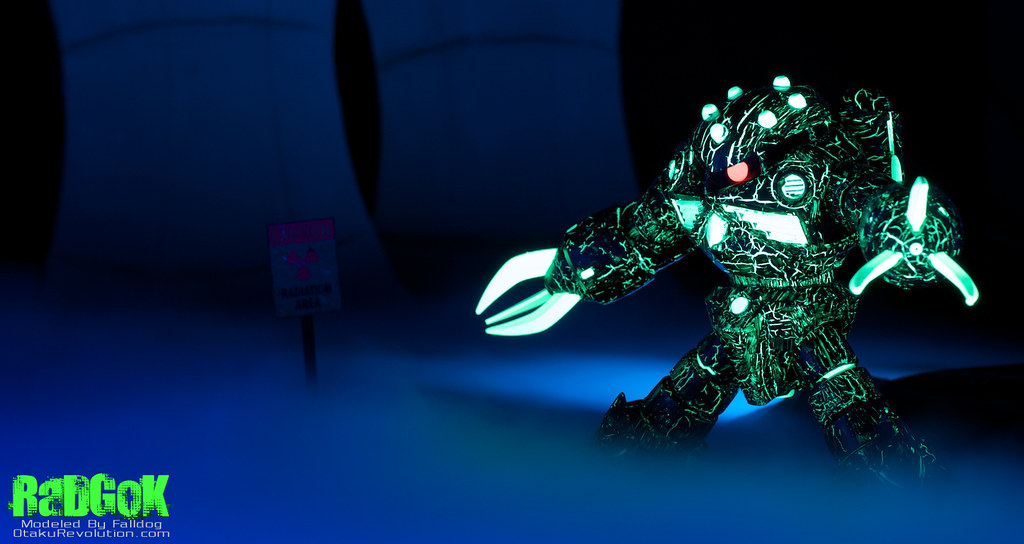
As I mentioned earlier a key aspect of the RaDGoK project was to be a submission toward G-Shot 2011. Along with the initial build there was a greater question on how best to carry the theme of the kit, a radioactive mobile suit, over into a photo. Early on shades of Chernobyl crept into my brain as an appropriate setting. Other ideas tumbled about, such as an post nuclear apocalypse cityscape or a neglected toxic waste dump (the latter may turn this kit into a full fledged diorama one of these days). In the end I wanted to keep things simple and decided to craft a pair of nuclear cooling towers for the photo’s setting.
I suppose I should share the photo first, before throwing another wall of text out there…

Ta-da!
Those who know me, or know many of my kits, know that I prefer to keep things relatively simple. While I also carved up other components, such a nuclear reactor and planned for others like a bust-through fence, I chose to leave them out. I didn’t want to clutter the photo and distract from the Z’Gok. Considering the conflicting lines of the model I felt that a background of smooth tones and rounded lines would work best.
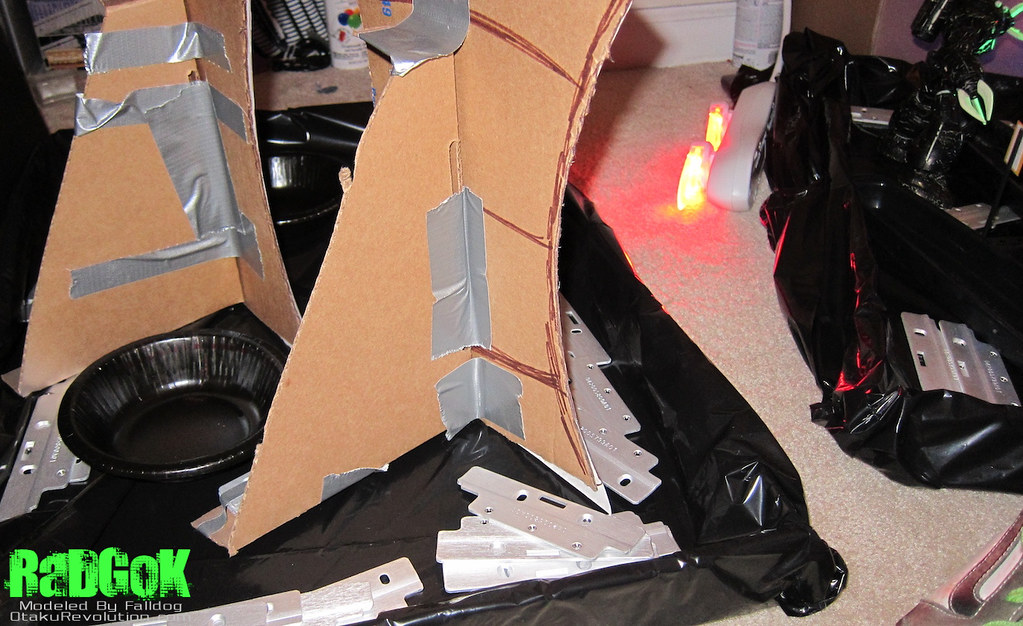
On that note I created a pair of cooling towers with a somewhat unconventional waistline. Made entirely from scrap they’re cardboard at the core, with a finishing of poster board and paint. Weathered on top with a bit of pastels, also used to create some horizontal curvature marks. They’re weighed down with some leftover aluminum parts held in place with duct tape (a highly overrated material I must note). The point of making them individually, not a part of some flat backdrop, was to add depth. As independent pieces I could move them here and there as needed.
Rear view of the cooling towers
Someone of you may remember my Night of the Living Nemo project finalized almost a year ago. There I first used dry ice to create a nice fog effect and decided to reuse the trick for my RaDGoK. This time though, with the benefit of experience, I wrapped key components in black trash bags to prevent my carpet from getting soaked a second time around. For the dry ice I found some low sitting bowls and painted them black so they would be difficult to see. I also used more of those leftover aluminum parts to hold the plastic bags in place as needed.
The RaDGoK and cooling towers were placed in separate containers so that I could move them forward, back, left, right as needed to get both the proper positioning and right amount of depth. An improvement over my previous Nemo set up, this allowed me to place a secondary light source between the kit and the cooling towers. Here I placed a power strip with a few colour changing LED nightlights. This allowed me to change the look of the backdrop without effecting how the RaDGoK was lit. Of the multiple colours tested I eventually settled with a nice blue. Red, as you can see in some of the extra shots below, looked good but clashed too much.
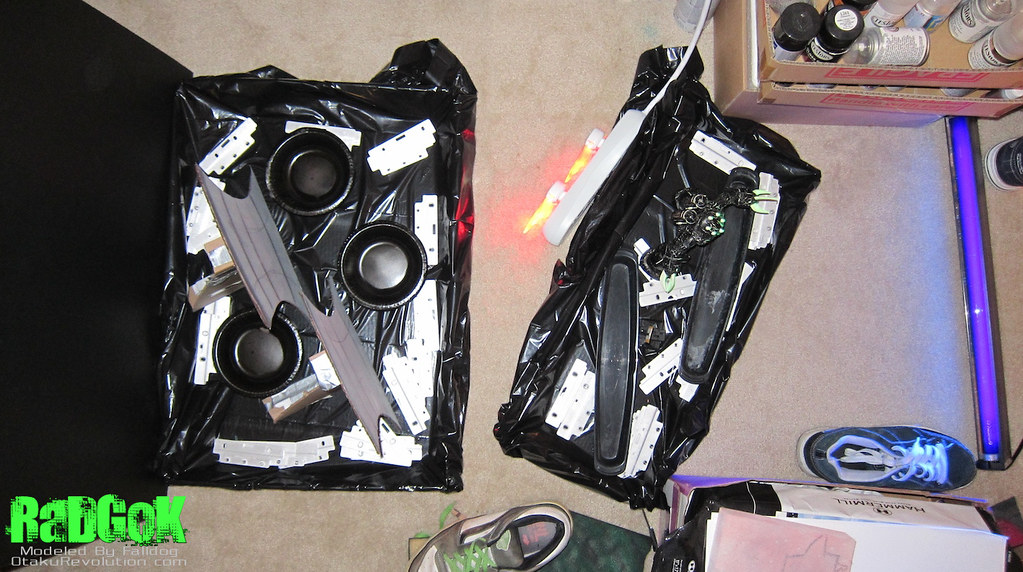
Note the layout and placement of the objects. The old shoes provide support 😉
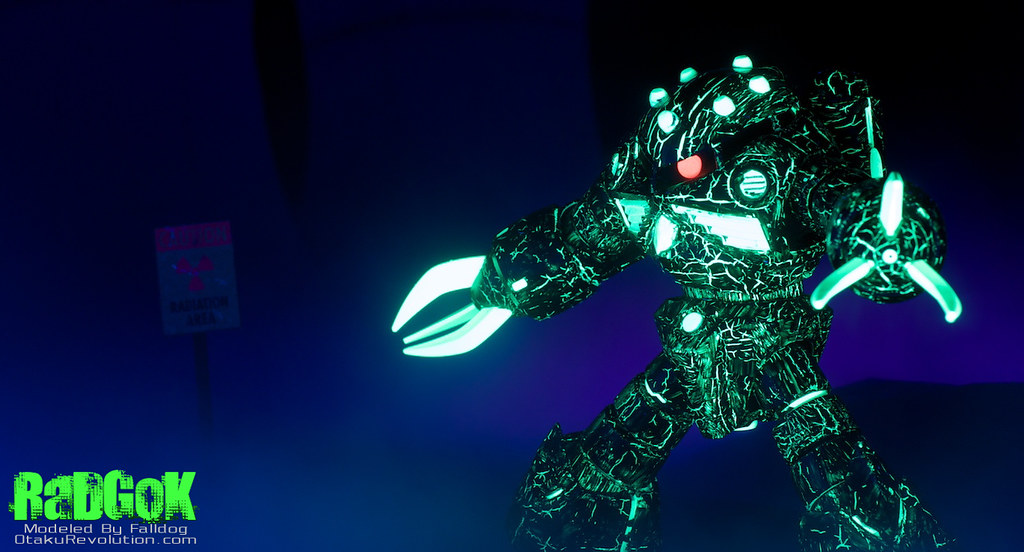
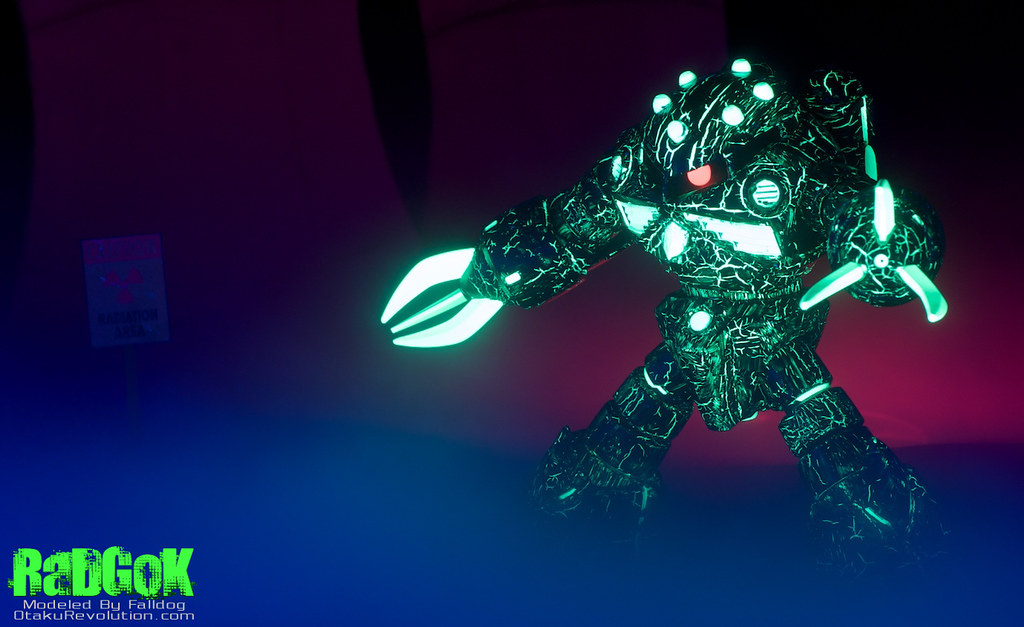
I went through a lot test shots before finally getting a shot I really liked. The majority of those were taken before adding the dry ice as I attempted to the shot decently composed. One thing I thought the shot needed was something to add an obvious context. It would be too easy to not pick up the large objects in the back and the last thing I wanted was such a simple shot confusing people. Thus the radioactive warning sign was born. Printed out on some poster board (most white paper reacts to the black light even through ink), weathered, held up with a plastic stick, and mounted in some other scrap plastic I had laying around.
During the first dry run (you know, with the dry ice yuk yuk) the sign was positioned off to the side. I tried moving it forward and back but it just seemed awkward and out of place. After sharing a few of the test shots it was suggested that the RaDGoK interact with the sign in some way. Holding the sign seemed to be the way to go so I added a base (ala pulled up concrete) and bent the sign (heating the plastic with a flame until it was soft enough to bend). To help the kit hold the sign I glued a bit of diced up runner to the back.
More Pictures:
And, for your enjoyment, a few more shots of the project. A couple of these are from the first attempt with dry ice, featuring the red cooling towers as noted previously.

Final Thoughts:
In the end this wasn’t about using nail polish as much as it was about thinking outside the box. As with any hobby it’s important to try new things out from time to time and I encourage fellow modelers to do the same. Let’s face it, nail polish doesn’t exactly qualify as the most suitable addition to the gunplaer’s arsenal. That doesn’t mean you shouldn’t give it a shot if something catches your eye.
Special Thanks:
I’d like to thank Baby TheEnd for giving me a second opinion when I needed one. And r/Gunpla for helping me brainstorm a name for this project.