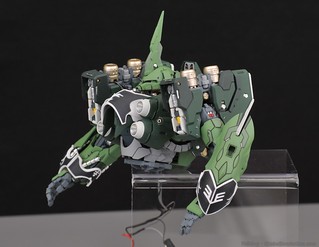
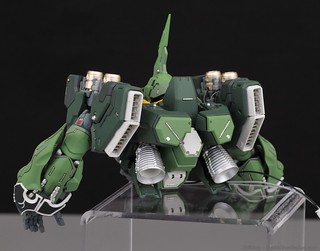
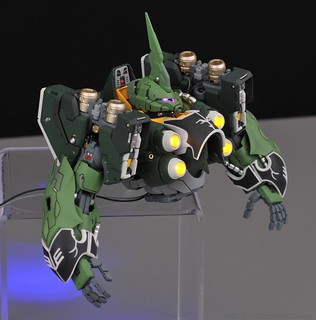
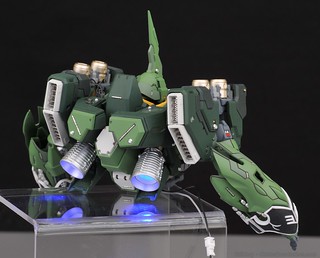
An overwhelming sense of doom.
That's what I'm feeling right now. While I should be pleased that this build is now officially a third of the way complete and things turned out okay I can't get past the fact that the kit's LEDs are royally fucked.
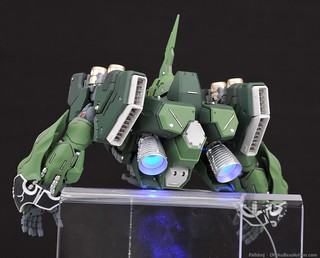
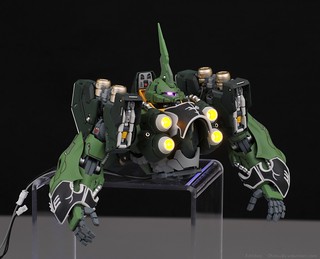
Before I get into that, how about a few pictures...
So that's a third of the project complete. Still gotta do the everything below the waist and the wing binders. If I can keep up the same schedule, which is a long shot, that'll be in about five weeks. From prep to top coat completion took about two weeks with an estimated ten hours of assembly time. Why so long? Well a lot of pieces had to be glued into place and the super clear modeling glue I use takes its sweet time to dry. That and the LEDs were a pain in the ass to work with.
For the most part, the LED installation went okay. The first problem I had is that a bunch of wires have been spliced together and wrapped in heat shrink wrap. It's thicker and stiffer than the wires so getting them into the place where I think the wires should be ran was a pain. The guide isn't really much of a help with the wiring. The two side parts of the torso aren't fully together because of this. The big issue I had came when trying to attach the hard points for the wing binders.
The torso's hard points are also LED power connection points. They're inside the golden cylinders you can see to either side of the head. While putting them in place on the right side of the kit all of the sudden all the lights went out. It took awhile to figure out what happened. Somehow one of the female connectors would cause a short when pushed into the piece it's supposed to reside in. I was freaking out the whole time and would never have noticed if I hadn't been installing with the lights on (a trick I picked up while working with the PG Unicorn).
So, I get the short fixed and a few minutes later I managed to break one of the wires. FUCK. The wire pulled from one of those heat wrapped joints and is positioned in such a way that I'd have to disassemble the entire torso to get at it. Technically, I'd just have to pull off one of the arms, the thing next to it, and the adjoining part of the torso. Unfortunately this kit's fragility means that god knows what would break or come off in the process. The wires are accessible but not in a convenient spot for soldering, I'd likely damage the kit with the iron. One end isn't long enough to really get at and manually splice either. At this point, despite all the fretting I've done over it today, I think it's just a lost cause. Two of the wing binders just won't light up unless I can think of a solution.
At the very least the torso's LEDs work:
For the most part, the rest of assembly went well. The metal piping, especially on the arms, was perhaps the biggest pain in the ass. I don't know how much of the inner lead piping I'll need so I had to cut just enough on either end to at least get it glued into place, and in many instances, it was just a tad too short and the glue not immediately effective enough for my taste.
Elyn Hobby's count on how many of the outer piping pieces should go on often seems short to me. In about half of the uses another metal piece could have easily fit on. I'm not sure how many other areas of the kit will need these pieces so I decided to follow their instructions and deal with the odd gaps rather than have pieces missing later down the road.
Perhaps the best thing that happened during assembly was my decision to grab one of those weekly/daily medicine/pill dose boxes. You know, the ones where you can layout your pills for the upcoming week in little boxes marked for the days of the week. I picked one up for less than $3 that has a total 14 of individual holders, enough for all of the metal details and most of the screws used on the frame. I was able to correlate what pieces where which based only because the guide was grateful enough to list a count for each type. Even that was half assed because some pieces are broken out into different counts and different sections for fuck knows why.
I rather like how the paint came out. All of the color separation and bold lines really work well with this design. Stripping the greenish chrome and repainting either silver or gold really made a world of difference. I did have a few issues with my top coat (second batch was a bit too thin) and there are a few pieces where I missed seam lines or other part flaws I missed until I started staring all to closely at the photographs.
Where I was hoping this would be a tour de force of my modeling skills, the Elyn Hobby Kshatriya is starting to get the best of me. This is a kit that needs a professional's touch and a professional I am not.

