This is a participating project in GAF's Grunt MS Group Build
At last, she is finished, and I'm pretty damn happy.

Okay, before I get into the photos, how about some info on the project?
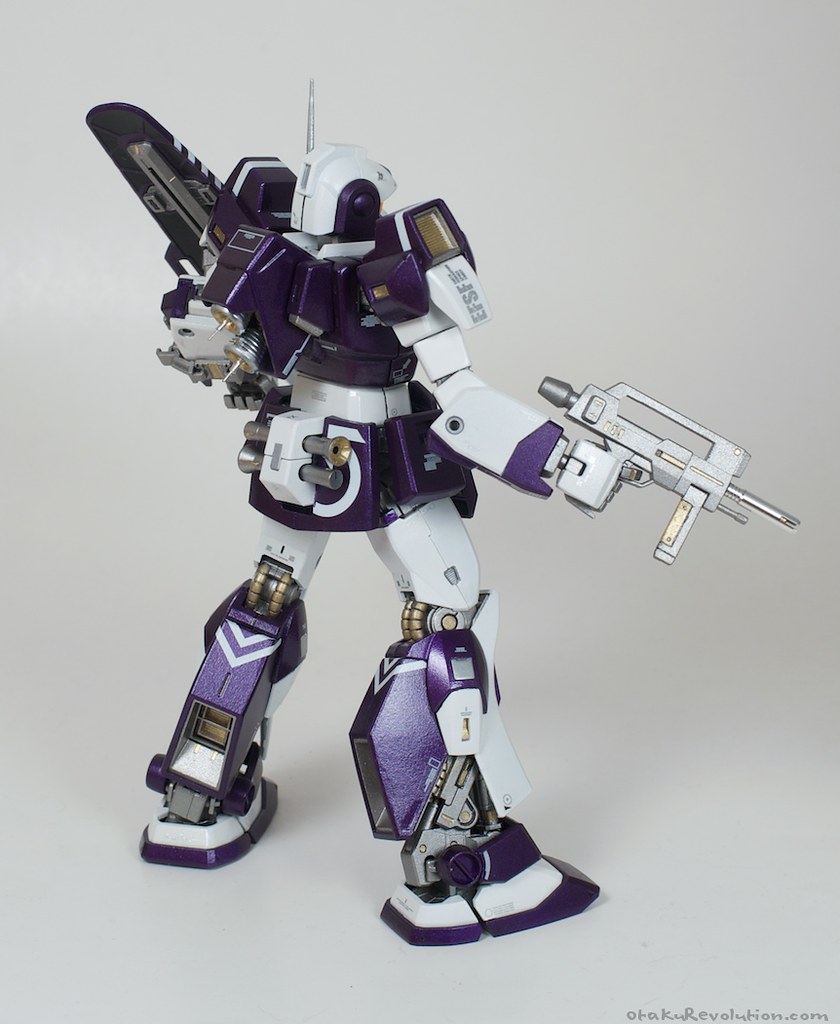
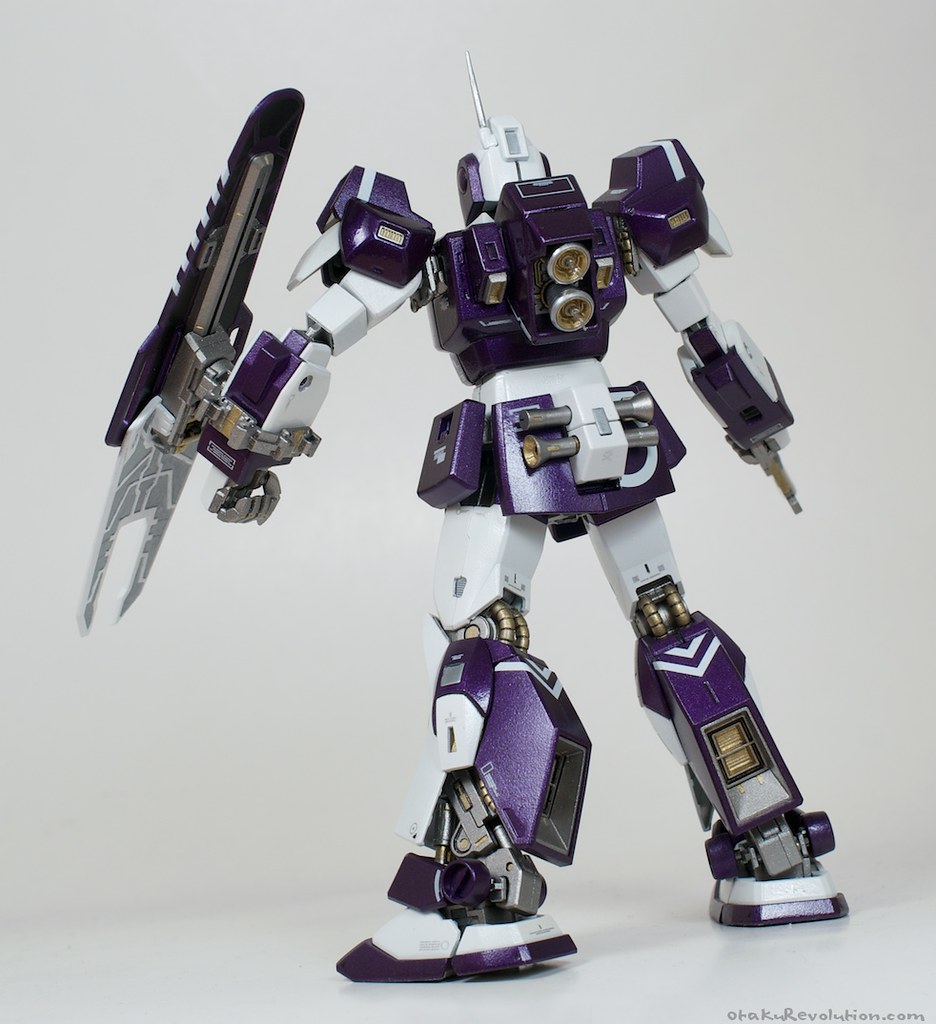
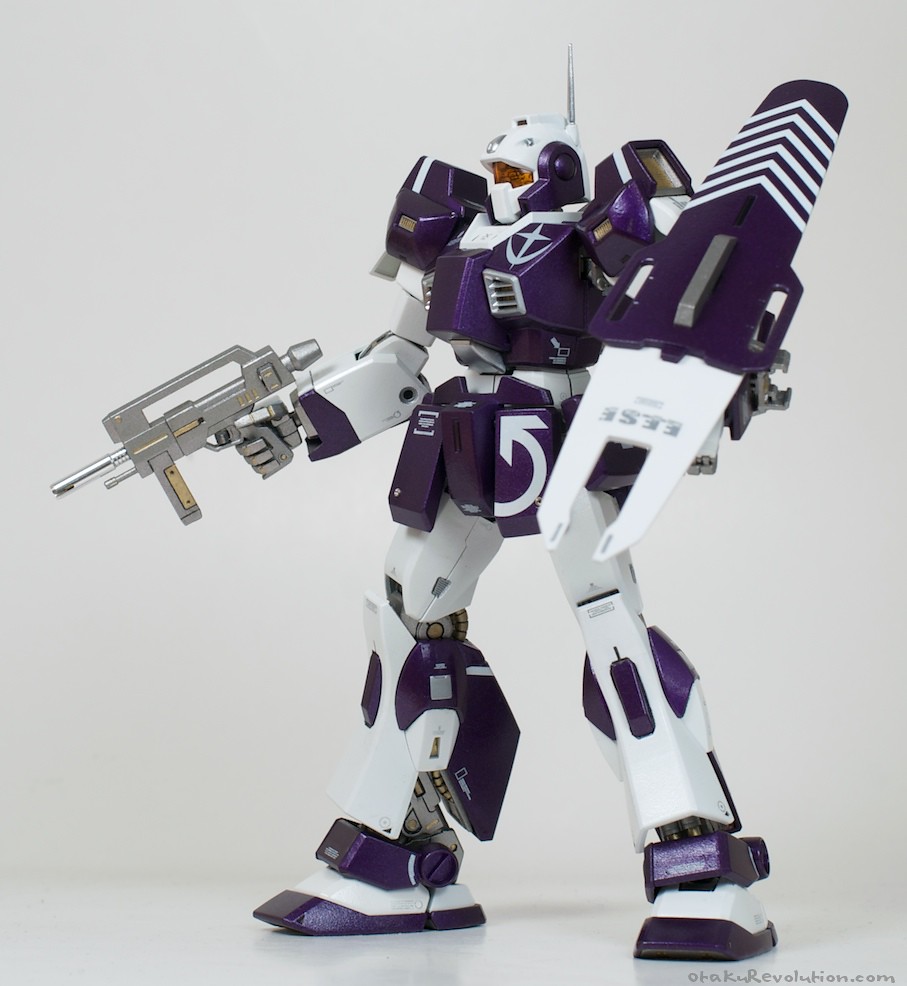
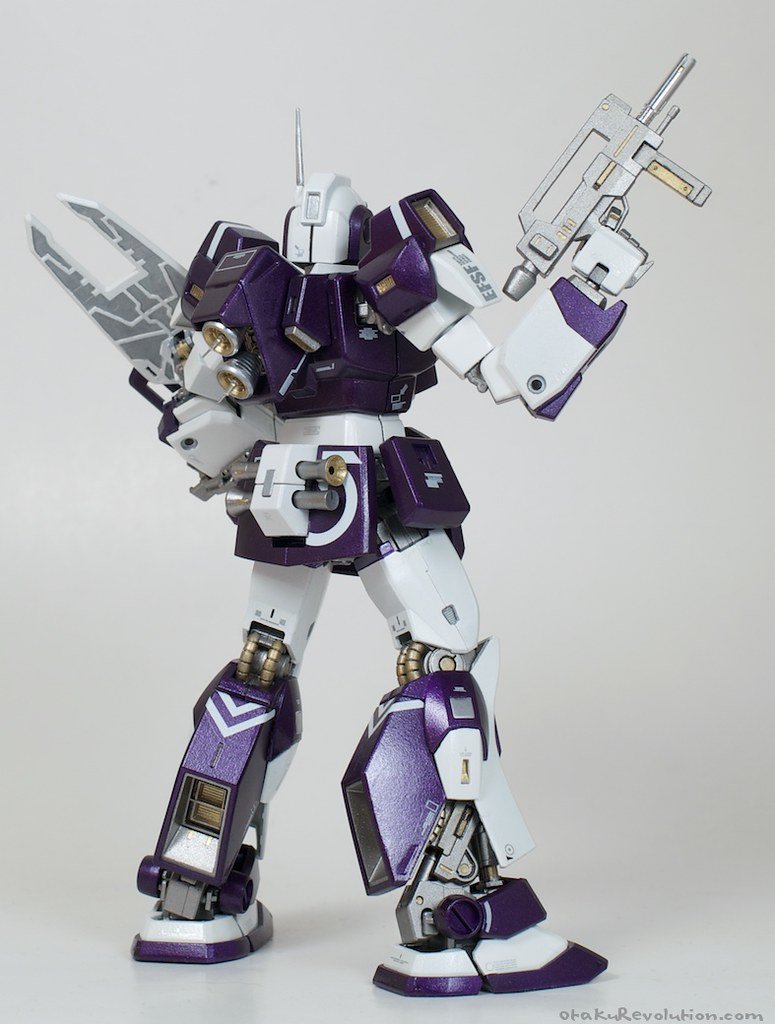
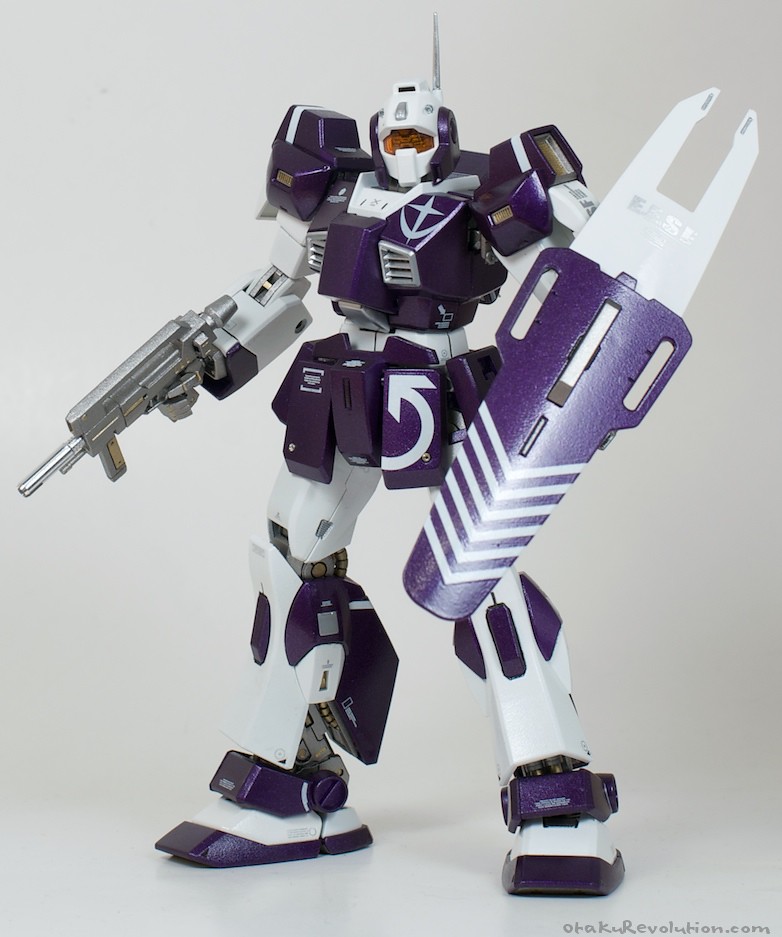
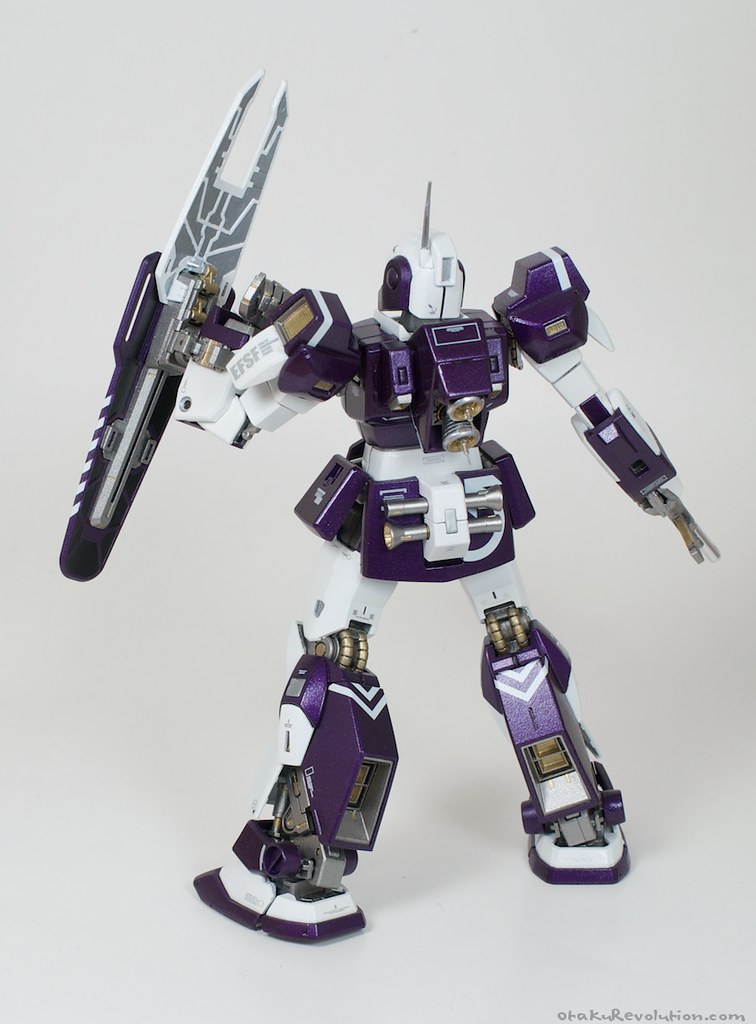
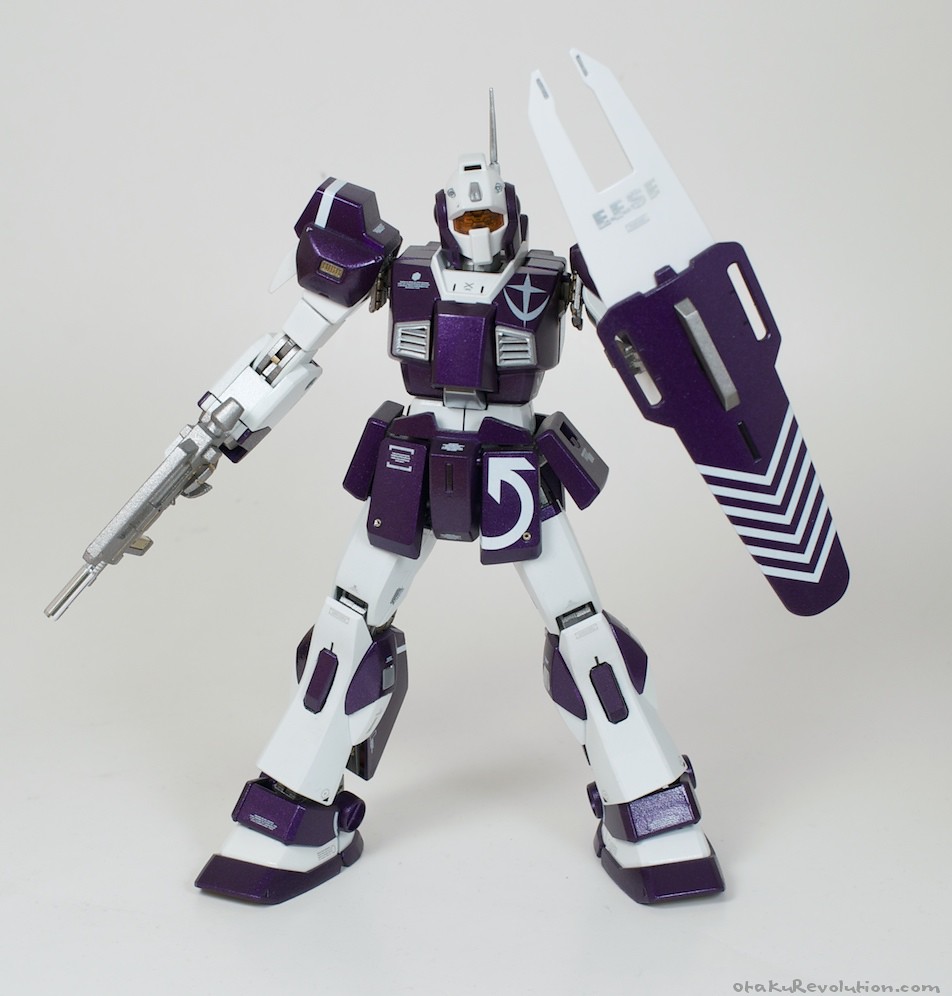
The scheme I followed on this kit is actually quite simple; all of the purple pieces would receive white decals and black detailing, all of the white parts would receive silver decals and silver detailing, and all of the silver parts would receive gold details and black lining. The brilliance is in its simplicity while the challenge was sticking to it. Here and there I thought of adding a little bit of this here, or a bit there, but keeping things consistent definitely paid off in the end.
As for the paints I used...
- Purple: Testors' One Coat Lacquer (spray w/ hand painted touch ups) - I really wanted to test out this paint line prior to using their lime green on another project. For the most part things went well though I did run into some issues. Whether it was from a to-thick-a-coat or direct sunlight I had instances where parts of a piece developed a cluster of dark bubbles, as though the paint had actually been burned a bit. Quite a few parts had to be sanded and resprayed due to this issue. The thinner used in the can is quite strong which made touch ups a pain. Hand applications needed to be dabbed on one coat at a time. Otherwise the thinner starts to eat at the existing layer, even if fully dry.
- White: Tamiya's Pure White (spray w/ hand painted touch ups) - For the most part the spray can performed really well. Granted, I had to make sure that I had perfectly primed all of my pieces before hand, but once they were white Tamiya was able to provide a nice clean finish. I was pleased to find out that their white jars match the spray cans perfectly so touch ups went smoother than I could have hoped.
- Silver Details: Model Master's Chrome (spray can) - My old favorite. Sadly the gloss coat made it more gray than the shiny chrome it was to start.
- Gold Details: Model Master's Brass (hand painted) - I decided to use brass instead of gold for a more subdued look. I think it turned out great.
- Silver Frame: Krylon Stainless Steel Finish (spray can) - I happened upon this can by accident and figured I'd give it a shot. While I don't think it looks anything like stainless steel works fantastically as a silver flake. It dries incredibly quickly and I never had to worry about dripping or pain defects.
- Primer: Krylon White (spray can) - Works very well and is very cost effective. The only problem is that it puts a considerably higher amount of particulate in the air compared to other sprays
The decals are from several different sources. Most noticeably, the white arrow and stripe marks are from one of Microscale's numerous train sheets. IC sockets were used for the waist thrusters and pointy bits on the rear nozzles.
For the top coat I experimented by using Krylon's "Triple-Thick Crystal Clear Glaze" spray. Pretty much the same as their gloss spray, but three times as thick. It worked okay I suppose. As with any of these gloss coats an orange peel texture is pretty much inevitable and most evident on the shield. I built a second shield and ended up using it as a test bed after a mishap. On it I was able use a fine grit sand paper to sand and re-coat once or twice to achieve a much smoother finish. While I could have done that with the finished shield, I didn't want to risk messing it up. In the end the triple glaze spray, while it won't beat Future anytime soon, should work just fine for beginners.
The gun barrel is a metal bit purchased off of HLJ. I modified by cutting the barrel off and drilling a 1/16 hole which matched the metal barrel nicely. I finished with some hobby glue to keep it in place. I also used that glue for the gun's painfully obvious seam lines. In my inexperience though, I forgot to fix the seam lines on the front of the gun. I'm not sure if that's visible in any of the photos below.
And now, some pictures. Not a whole lot of variety in the poses, I know. I didn't want to risk paint transfer between the purple and white parts.