

Finally complete, yay!
For those of you new to the project, a little background first. After a long hiatus from Gunpla I returned to the hobby with this, Char's Zaku II, back in 2008. Being my first kit in a long time, and a Perfect Grade one to boot, my Haro did it turn out like shit. Poor lining job, no details, stickers, and an orange peel gloss coat on top. I'd often thought about tearing the whole thing apart and giving it a proper paint and detail make over. Between my ever growing backlog of kits, and the difficultly of sanding down such a gloss coat, the thought never came to fruition. Instead I decided to revise it and complete another idea I've been bouncing around, a clear - yet frosted - Perfect Grade kit.
Back during my MG Victory project I found that a clear plastic piece picked up a frosted look after a nice dull coat. I wanted to carry that idea to a full size kit but only a PG would do with all of the internal detailing held within. Reluctant to buy a whole new kit just for for such a gimmick project I found myself the PG Zaku clear option parts and started to repurpose my poor old Zaku.
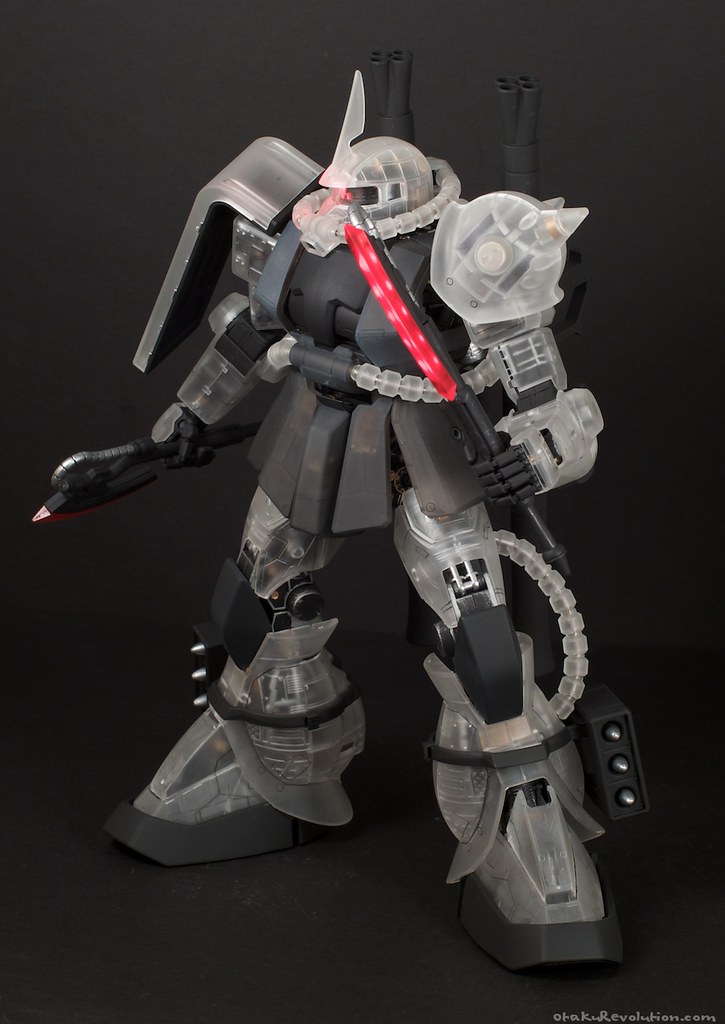
The end result is what you see here. A rather rushed internal detailing job of silver and gold on flat black. Frosted pieces all around, darkened torso armor, and silver detail on the outside here and there. It was incredibly easy to do overall and was [comparatively] quick to complete. It just took longer than I would've liked on account of real life being, well, interesting as of late. I had tinkered with the idea of doing a full detail job, complete with decals and special markings, but felt some experiments are left as such.
I did learn a couple of lessons from this project. Takeaways that need to be shared...
- Don't be afraid to revise an old kit - If you're like me you have a bunch of kits from your early Gunpla days, and they show it. Nubs, terrible paint jobs, etc. These kits are great test beds for new techniques you may have been thinking about trying. Give it a shot and show them some love. Better to workout the kinks on an ancient 1/100 Wing kit than on the latest MG you just plopped down $$ for.
- Sometimes smilair paints can result in inconstant results - Take a look at the side torso armor portions and compare them to the skirt armor. Notice how they're of slightly different tones? I'm not really sure what happened there. I used the same paints and the same top coat, making sure to the same layer count across all the pieces. It may have been a different jar of paint or a cop coat but something happened that caused the colours to shift just enough. Unfortunately issues like this happen from time to time. Just be prepared to roll with punches, repainting or working around them as best possible.
- The early Perfect Grade kits are anything but - Okay, it may have been my shotty construction work years ago, but the PG Zaku isn't exactly the greatest of kits. There are weak joints here and there, seams that don't close properly, or parts that are randomly falling apart (see if you can spot all the issues on my kit). The PG Zaku is almost 13 years old and the PG RX-78-2 almost 14, predating the MG Zaku II 2.0 by almost 8 years. They feature tons of Bandai's horrible screws and a wiring system that makes one long for the contained units Bandai has moved to over the past few days. If you get either of these two kits prepare for one hell of an experiance. I don't recommend them for those just starting to venture into PG territory. Start with something newer like Strike, 00, or Strike Freedom. The latter two may not feature as much internal detail but you'll appreciate it a lot more when you don't have to worry about your kit randomly toppling over.
- Dull coats have a point of deminishing returns - When applying gloss coats it's easy to the layers build and the orange peel textures start to form. This isn't the case with dull coates. By working on clear pieces I noticed that after a coat or two subsiquent coats bring nothing to the table. Expescially with the Testors brand I used for most of the kit, the spray's mixed in thinner seems to breakdown the previous layers enough to result in no net change. A heavy coat to one area at times even returned the piece to its clear state until the coat dried out.
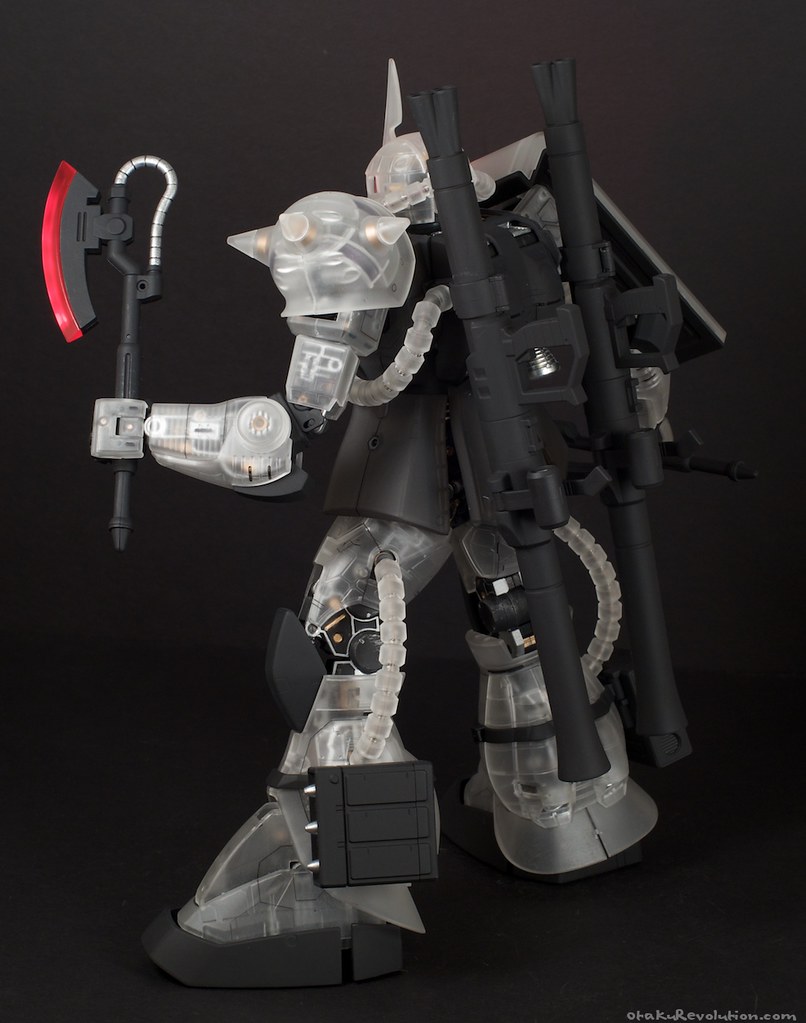
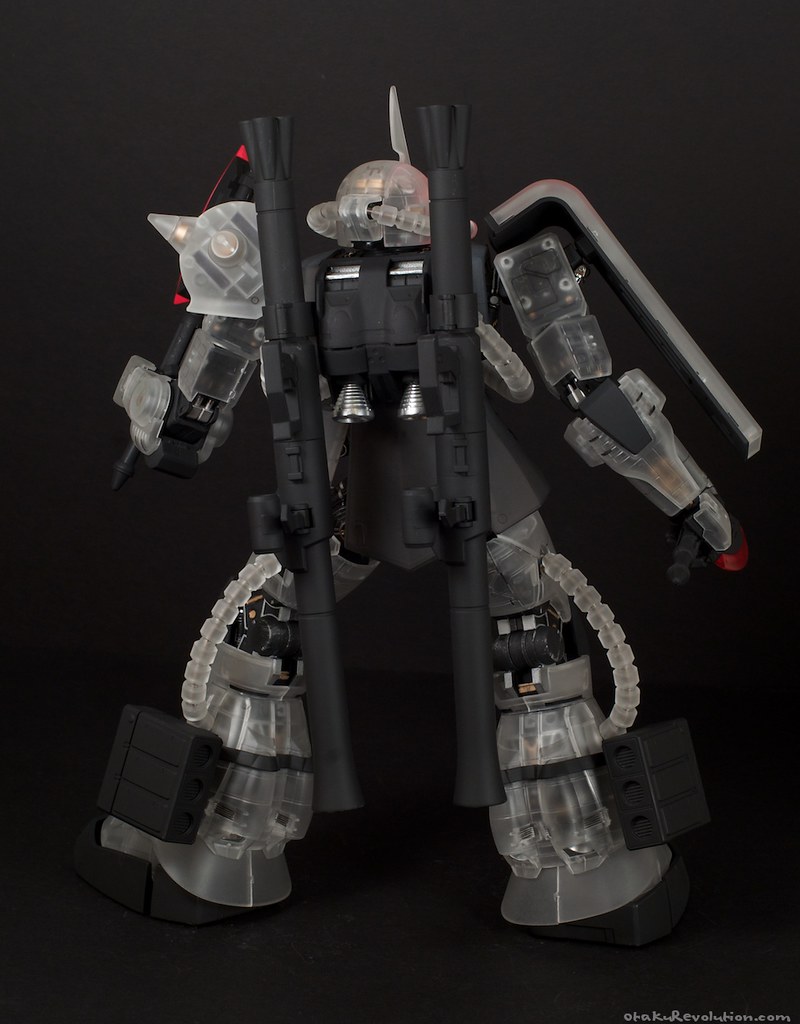
And the rest of the images for your viewing pleasure...

Now that that concept is out of the way, onto the next one...


